Translate

Wednesday, December 12, 2018

Creating a Permanent Wall out of the Rollup Door

One of the biggest changes to my truck and main framing job was putting down the roll-up door permanently. If you're planning on doing that, here's how you do it. (or at least, how I did it.)


Of the few people that talk about their box truck conversions online; Most people seem to put their normal door through the roll-up door. In my case I'll be building a motorcycle carrier and propane storage on the back, so I put the door into the side instead.
It's actually (surprisingly) made of a compressed engineered-wood composite, not metal. Also, when the door is down it actually moves a bit when you press against it. Considering that this will not only be my kitchen wall with my sliding window, it needs to be strong enough to hold the weight of drywall, studs, etc.


Originally I was thinking of removing the whole thing, but why when I can use it to act as external plywood for my wall. If you decide to remove the whole door, or put it down permanently, you still have one safety factor to consider: The door is connected to and pulled up by two metal wires on the side that run the height on the outside, up into a coil inside the truck above the door and main header. These springs have really high tension and are very dangerous - people have been seriously hurt when they cut the strings and aren't careful. We'll get to how I did that in a minute.
I can't recommend how to remove the door entirely, but there are certainly ways people have done it online. Please do some research if you end up going that route.

Framing the door first

Before I cut the wires and keep the door down forever, I needed to re-structure it so that it didn't move back and forth. I did this by adding in a baseplate first, and then a horizontal crossbrace connected to the side walls. This left me just enough room to slide a vertical 2 x 4 between that brace and the roll-up door - forcing the door to be straight.

I put the crossbrace low enough so it would be hidden inside my kitchen cabinets. This framing was pretty odd, i'll admit - but it worked. I added in more studs so it became a 16in center wall (just with extra studs)


Fortunately, it didn't take too many 2 x 4s to make the door sturdy enough to hit without it moving or anything. (Of course, every stud was screwed into from the outside.)


Cutting the wires


Oh, the nervous part. Unfortunately, I didn't take photos of this part - but it's pretty straightforward. 
When the door is down, the wires have high tension so when you cut them they're going to snap up very quickly and spin around that coil on the inside.
The wires are thin enough where I figured I could stand on the side of the truck and cut the very bottom of the wire where it connects to the door, and be safe. You just don't want to be facing the wire when it whips forward and up. This worked great.

I stood on the side with my angle grinder, my arm reaching around, and cut one of the wires at an angle similar to \ , and it just did a weak "pop." - didn't whip up, anything. I was surprised, but still careful, so I walked around the truck to the other side to cut the other wire in the same fashion. As soon as I cut through the second wire, both of them shot up and whipped around on the inside, but stopped after a second or so. Make sure you're on the side.
I checked the roof on the inside afterwards, but thankfully it didn't dent anything. That was it! I was nervous, but it was finally done. 


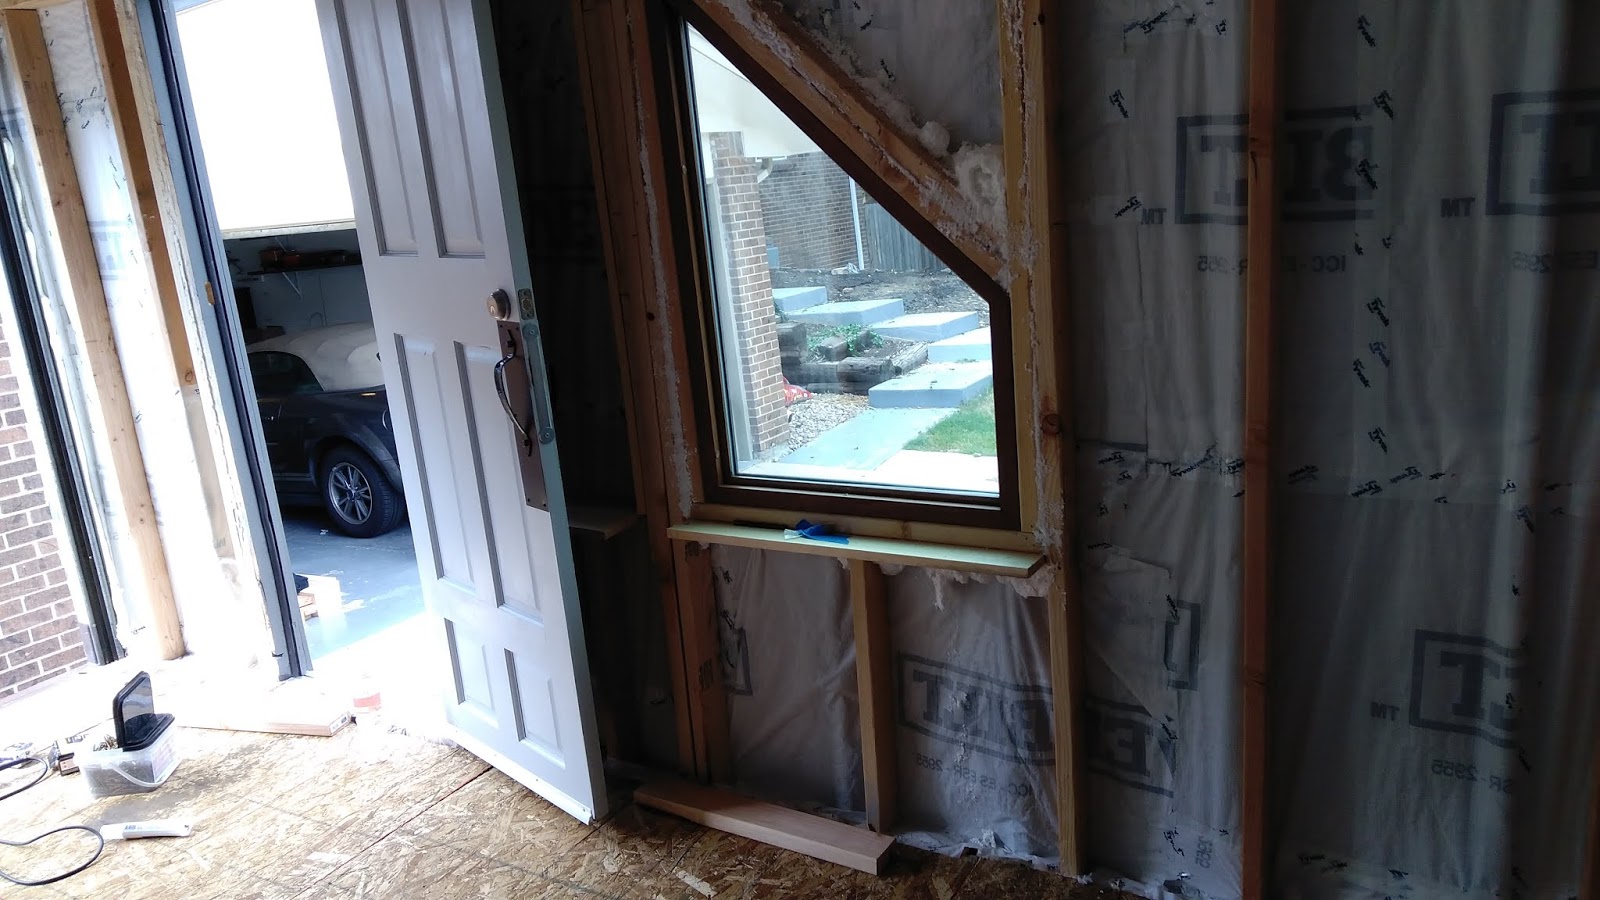
Cutting through the door / Adding in the sliding window


Since the door is made of a wood composite, I had to use my circular saw to cut the hole I needed. This was a pain to say the least - I ended up using a sawzall to get the hole to the right size. There are hinges on the inside that connect the panels of the door together - since these were steel and I didn't want to send sparks flying everywhere, I positioned the hole for my window just barely around the hinges so I only had to cut the wood.
Otherwise the framing was just like a normal window! 


Now that the door was down and the window was in, I added my spray foam along the edges of the door, and my window framing.


One large can of sprayfoam filled all the gaps for the door by the way.


--

Now the rollup door is finally in place, and I can work on plumbing and my kitchen.


Thank you for reading, and I hope this post helps show how to take down the door if you choose to!


Till next time,

Kelli
 
--------
 
Update: Feb 27, 2022
 
The door has worked great! I've put a lot of weight unto it and it has never been a problem. The only thing that would have been a lot easier is when I framed the small window, I wish I made the frame for it more flush. I ended up hand-chiseling the "window sill" part on the bottom off when I did the wall planks for the kitchen.

Flooring OSB, Insulation, and Hardwood


A lot of building steps rely on having other parts built already, at least for the ease of construction. Now that I had my door and large window in, I was ready to pull down the roll-up door permanently. Instead I thought about how the big open wall would make it much easier to get the large OSB sheets in, so I decided to do the flooring first.

As the first step I added my flooring studs directly unto the wood decking of the truck, and then covered it in my waterproof barrier.
 In this case, I faced the printed side down so any moisture from the underside decking wouldn't condense into my insulation and hardwood flooring. I had a can of clear sealant laying around, so I also sprayed the wood area behind my wheels as well under the truck as an extra seal.

I was worried about the floor creaking when you walked around, and my flooring bowing over time, so I put my flooring studs 12 inches apart on center instead of the normal 16. (Some of them are closer to 10 when they didn't run the entire width.) 
This ended up working perfectly in the end, although I wish I had added fireblocking between the studs for an easier time screwing down my OSB. Insulation was also a little tricky, but it fit in there well enough. I used a normal R13 fiberglass insulation for the floor - the same for my walls as well.


I used 15/32 PS2-10 OSB 4ft x 8ft sheathing for my flooring (pretty heavy duty). I'm glad I went with the heavier stuff - after I put it down on the studs and insulation, it didn't sound like you were walking around in a truck at all.
So after using my circular saw to cut the edge of each OSB (so I could just drop it in place), I screwed them down into the wood flooring studs and tried to make sure the osb was as level as possible.

I started screwing them in from one vertical side, and then one horizontal side at a time. My insulation padded the bottom so they stood up a bit; Once you screw in the sides, it will press down and level out. My insulation has worked great so far, but insulation board would have worked well I think.

 The trickiest part was cutting the correct size cutout of multiple OSB pieces for my bathroom. (that little square there). Other than some muscle power - the OSB was easy enough to use.

 I'm ready to add in my hardwood flooring now that i've leveled all the OSB.

Adding in the Flooring


At this point, my chop saw broke. Right at the exciting part!
So I ended up getting this Porter and Cable miter saw for about $90 (luckily they had them on sale at Lowes- and I had just bought a new 40 teeth blade.) I wasn't expecting that expense, but that's what happens when you get used tools I suppose. I got my use out of it though!

So to start off, I was originally planning to have two different levels in the truck so I could have floor storage in my kitchen. This design was the plan when I bought the flooring, even though the design ended up being changed. (I have had the flooring for about... 9 months or so at this point when I actually got to put it in.)
I really wanted hardwood/solid wood flooring in the truck for longevity (and style), but the price for the red wood I wanted was crazy! So I jumped unto google and looked up hardwood flooring stores in my area, and called around until I found one that keeps their inventory on site. I asked the guy if he had a "make-me-a-deal" pile of extra flooring in the back, and coincidentally they did, so I decided to drop by to see what they had.
I ended up getting beautiful hardwood for 1/3rd of the price of retail, and these clever entrepreneurs got rid of that extra inventory in the back. I walked away with about 90sqft of Caribbean Rosewood and 60 sqft of Hickory for $300. (I paid a little less than $3 a sqft, when it's somewhere around a $1300 value)
It was more than I planned to pay originally, but I'm so glad I did. The flooring is gorgeous and very versatile. So if you're willing to look around and talk to people, you might be able to luck out like I did!

 Both types of flooring are tongue and groove floating, which made the installation very easy. I started with the hickory in the kitchen, and butted it against the wall and hammered them together. Most of these towards the roll-up door are going to be underneath my cabinets, so I actually screwed these down into place so they wouldn't move when I put down the rest of them.


As you can see, I did not add underlayment underneath my floor. If I had gone with laminate I would have, but the more I talked to people and looked around it seemed underlayment was more or less just a vapor barrier with minimal padding- so I decided to go without it. I don't think it would have hurt to add it though.


Once my hickory was in, I started to put down the rosewood. I decided to switch the board direction for the different types to really differentiate the areas.


I started by adding the planks against the edge of the hickory, and running them along the length of the truck, hammering them in from the side. Remember to take planks out of each box to better match the colors! (For the rosewood it didn't matter much though)
I actually got all of the rosewood in on one day - but I have since gone back and re-hammered some back into place and pre-drilled through the planks on the side to keep them in place. (they haven't moved since)


So there we are! I'm so glad I finally got the flooring in. It'll make construction on the roll-up door much easier now.

Thank you for reading - if you have any questions or concerns, feel free to leave a comment. Till next time!

Sincerely,

Kelli