Aside from the general cost of drywall - it's heavy. I wanted something that was lightweight, sturdy when nailed to the studs, and was something I could afford. I ended up buying semi-flexible hardboard paneling at Home Depot for $8 for a 1/8th x 4ft x 8ft sheet, and I trimmed them with a jigsaw.
Before I paneled the walls, I insulated the walls with R-15 fiberglass insulation sheets
 |
| Here you can see the insulation on the ceiling, and the sanded and painted hardboard panels |
The start of paneling:


 |
| Here you can really see how the edges weren't smooth yet |
I covered all the edges with a drywall caulking first to try to smooth
it out as much as possible. The second step was to go over the walls
with joint compound. I bought this box of joint compound for maybe $11, and it was enough to do most of the truck walls. Pre-mixed, lightweight, "all purpose" joint compound worked great. I still have some in the box and it still works!

I used a plastic mud pan with a metal edge, and cheap plastic putty knives (one small, one large). You can add water to joint compound to make it thinner (I used a spray bottle) but add too much water and it will crack when it dries. (You can sand those cracks out if that happens).

 |
| The joint compound was a tan color, but dries to white |
 |
| Trying to level out those surfaces and add texture to the wall so the edges don't stand out |


It takes hours for each layer to dry so this was a multi-day project. It's not something you can do in one day. Once the layer was dry I would sand it with 200 to 400grit sandpaper, wipe the wall down with a dry towel to get off the dust, and apply more coats as needed. The moisture in the joint compound will soak into the hardboard panels and it'll be somewhat humid and you can smell it before the compound dries. This will go away and doesn't affect the strength of the panel, it's just affecting the surface till it evaporates. Wear a respirator when you're sanding that drywall mud, as it's very fine and you may want a fan in there as well.
If you have any corners that stand on their own, like my bathroom wall
corners below, then you need to add corner bead to the edges. It's a
thin metal strip that gives strength to the corner and lets you get a
sharp edge. You cut these with tin snips and they nail into the stud with wide head nails (Short, smaller diameter nails - even galvanized roofing nails could work); These require heavy
amounts of joint compound to cover up - I went as thick as 1/4inch in some areas, but less is better. You can smooth out the edges later. Be precise when you're hammering, and try not to hit it hard enough to bend the metal
inwards. If it bends, it's hard to get back into place. They don't have to be perfectly flat against the wall, but pretty close. You'll get the hang of it
with a little practice. It doesn't hurt
to buy an extra piece or two than you need. I was glad I had an extra piece!


Once it was entirely dry, and I was satisfied with the texture, I sanded the surface and cleaned off as much dust off the walls and out of the truck as possible (A broom on the wall helps get the dust off). Now it was ready to paint.


 | |
| The heavy texture hid the edges really well and I liked that look thankfully |
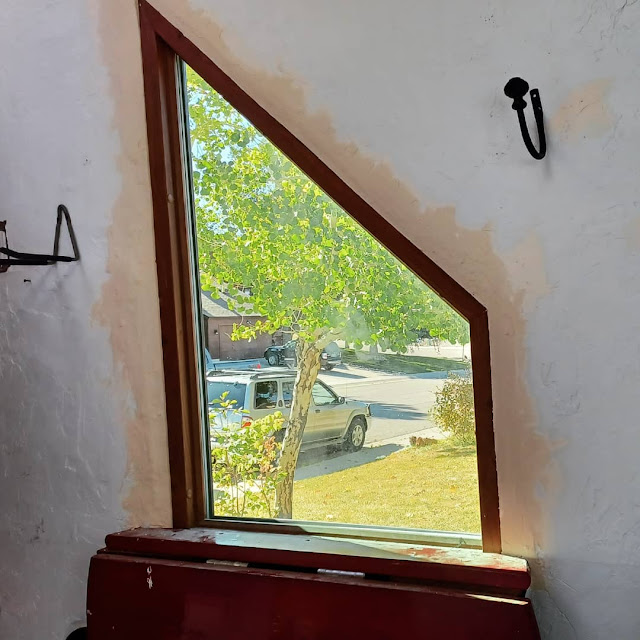
Originally I planned to trim the edge of the window with cedar, but I decided to just level out the difference with joint compound and make it flush with the wall.

 |
| I used that drywall caulking again to smooth out the edges |
 |
| Trying out storage options |
Update July 19th, 2024:
The walls panels have worked amazingly - even on extremely humid days, the walls hold up perfect and don't smell, they haven't cracked, and the joint compound has worked really really well. (probably because it's only a feather coat, and the elastic tension of the paint on top of it hold it in place like a normal wall). The joint compound attaches to the hardboard just like drywall, even in thicker areas.
The hardboard panels do flex slightly, so I think they worked great for this application. I honestly think the waterproofing has made it all work as the moisture permeates through the panels, past the insulation and waterproofing, and gets stuck onto the metal shell of the truck so the panels are never damp and it's worked great.
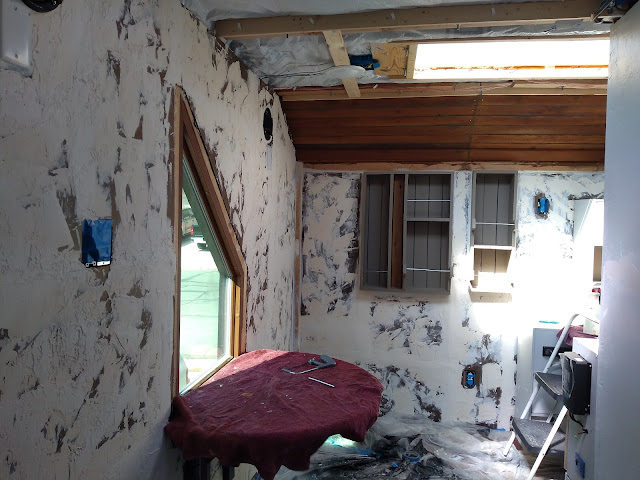
The Ceiling:
I used this same design on the ceiling, although there's a lot of flexing in that area - we'll see how it holds up long term.

My ceiling studs are 2 x 4s that are flat against the ceiling, and bolted through the roof with stainless steel carriage bolts, locking washers, flat washers, and a hex nut. (and blue lock-tite on each bolt). I screwed 1x3s to the side of these 2 x 4s to create cavities deep enough to add insulation. (and hold my plumbing pipes to my shower).
 |
| There's a lot more flex in the ceiling, so I added more space between the panels to fill in the space with flexible caulking |


Now that I leveled it out the best I could, It was time to plaster. I did a very very light coat of plaster on the ceiling as I wasn't sure how it would hold up - I mostly just want to cover the caulking lines and have it appear slightly textured.


 |
| Many light layers helped achieve a textured look without putting too much on the panels. I tried to compensate for the flex of the ceiling by leaving a small amount of space between the ceiling panels and the wall panels. I covered this with a flat base trim, that I nailed into the ceiling 1 x 3s |
 |
| I wanted a semi-gloss ceiling to show off that skylight |


 |
| Here it is all together - with some new colors |
So there we are! These have worked really well so far, and I would recommend them if anyone is looking for a cheap way to cover a wall. If you think you'll be in an extremely humid environment, I would recommend treating the panels with a primer first and then plastering them to make sure they don't take in too much moisture. I haven't had a problem with humidity, but I also haven't had them sit in a humid environment for a long period of time. Inside the bathroom, I used a thicker plywood for the walls that I treated with multiple water-proofing agents, including the ceiling.
 |
| I wouldn't use the hardboard in a wet location - instead I used 1/4" plywood, sealed and re-painted with many layers |
So to recap - if you're looking for a cheap and simple way to panel a wall - I highly recommend hardboard panels. If you have any questions, feel free to ask me.
Thank you for visiting my site and I hope I gave you an idea or two!
Sincerely,
Kelli
No comments:
Post a Comment